
Pay once, keep your memories for years — no subscriptions, ever20% off any paid plan — use code GUESTI20Try for free with our starter plan — no credit card requiredPay once, keep your memories for years — no subscriptions, ever20% off any paid plan — use code GUESTI20Try for free with our starter plan — no credit card requiredPay once, keep your memories for years — no subscriptions, ever20% off any paid plan — use code GUESTI20Try for free with our starter plan — no credit card requiredPay once, keep your memories for years — no subscriptions, ever20% off any paid plan — use code GUESTI20Try for free with our starter plan — no credit card requiredPay once, keep your memories for years — no subscriptions, ever20% off any paid plan — use code GUESTI20Try for free with our starter plan — no credit card requiredPay once, keep your memories for years — no subscriptions, ever20% off any paid plan — use code GUESTI20Try for free with our starter plan — no credit card required
Start free
Journal / QR ideas

QR ideas

How to Make a Wedding QR Code Part of Your Invitations and Decor

Make a functional wedding QR code feel considered and personal across invitations, signs and table stationery.

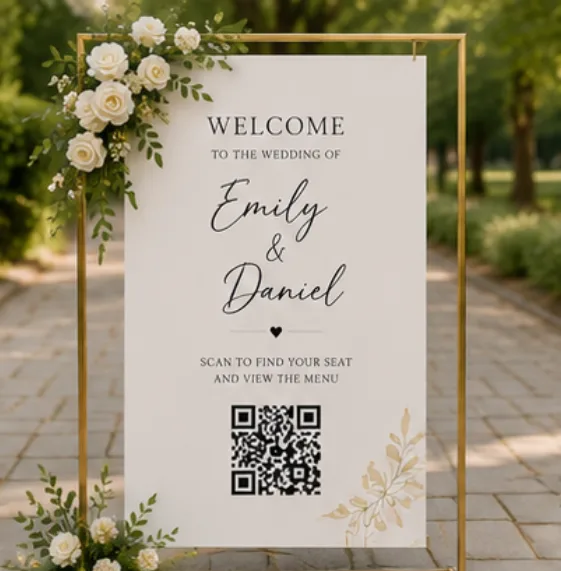
Personalised wedding welcome sign with a QR code

A QR code does not need to look like a technical afterthought. Used carefully, it can sit comfortably within an invitation suite, welcome sign or table card without competing with the typography and details you have chosen for the wedding.

Personalisation should happen around the code rather than at the expense of scanning reliability. Build a calm visual frame, use the same words and colours as the rest of the event, and let the downloadable code remain crisp, square and easy for a camera to recognise.

Begin with the event identity

Gather the colours, typefaces, monogram, illustration style and tone already used for the wedding. Choose one or two of those elements for the QR piece. Repeating everything at once can make a small sign busy and leave too little quiet space around the functional code.

Make this decision before designing signs or sending messages. Start with one clear requirement: use the invitation's supporting font for instructions. Record the choice in the main event plan, then ask someone who was not involved in setting it up to try the journey. Their first hesitation will usually reveal where wording or navigation needs to be simpler.

  • Use the invitation's supporting font for instructions
  • Repeat one border or floral detail
  • Keep names or monogram more prominent than technical wording

Design a safe area around the code

Every QR code needs an empty margin so the camera can distinguish its edges. Place it on a plain, high-contrast panel even when the surrounding stationery uses patterns or photographs. Do not crop the corners, stretch the square or place script lettering across it.

Keep the practical version straightforward. Export at a print-ready resolution or as SVG. Keep all four edges unobstructed. Avoid pale ink on a pale background. These are small details, but together they determine whether a guest acts immediately or decides to return later and forgets. Test under the same conditions in which people will actually use it.

  • Export at a print-ready resolution or as SVG
  • Keep all four edges unobstructed
  • Avoid pale ink on a pale background

Adapt the message to the moment

An invitation might say 'View details and RSVP', while a reception table card can say 'Add your photos and videos'. The visual treatment can remain consistent even when the instruction changes. This makes each code useful without making guests learn several different systems.

It helps to assign one person to own this part of the plan. Give them three clear checks: use RSVP wording before the deadline; switch emphasis to memories on the wedding day; and link to one event hub where possible. Clear ownership prevents well-intentioned last-minute edits from creating two conflicting versions.

  • Use RSVP wording before the deadline
  • Switch emphasis to memories on the wedding day
  • Link to one event hub where possible

Use formats that suit the setting

A small enclosure card, acrylic welcome board and folded table tent all create different viewing distances. Scale the code and instruction together. For fabric signs, textured paper or letterpress, run a physical proof because absorbency and surface detail can soften the printed modules.

Do a final check from a guest's point of view rather than the organiser's. Can they understand the next step in a few seconds? Can they complete it one-handed on a phone? Pay particular attention to two points: allow a larger code for welcome signage, and use matte finishes where glare is likely. Keep the result calm enough to sit naturally within the event.

  • Allow a larger code for welcome signage
  • Use matte finishes where glare is likely
  • Keep table signs stable and upright

Carry the design into the digital page

The scan should feel like a continuation of the sign. Add the couple's names, cover photograph and wedding colours to the destination so guests immediately know they have reached the right event. Consistency builds confidence before anyone uploads a personal photograph or submits an RSVP.

Plan the handover as carefully as the setup. Use a recognisable event cover. Keep the first action obvious. Preview the page on a narrow mobile screen. Once the celebration is over, write down where the final files or records live so the collection remains understandable without relying on memory or continued access to one service.

  • Use a recognisable event cover
  • Keep the first action obvious
  • Preview the page on a narrow mobile screen

A simple way to put the plan into practice

Start with the smallest complete version of the experience. Open the page as a guest, follow the main action and check what happens after it is complete. Then repeat the test on another phone and on mobile data. This catches unclear labels, inaccessible links and files that only work for the person who created them.

Work through the day in order: begin with the event identity, design a safe area around the code, adapt the message to the moment, use formats that suit the setting, and finally carry the design into the digital page. Decide what guests need at each point and remove anything that belongs mainly to the organiser. The result should feel like a thoughtful part of the celebration, not a project-management system placed in front of guests.

Keep one private record of links, access details, publication choices and download deadlines. Digital event tools are most useful as a collection and communication layer; important photographs, videos and guest records should also be exported to storage you control. A short review after the event is the right moment to approve shared material, build albums and make independent backups.

Before sharing anything widely, run a small rehearsal with two people: one who knows the event well and one who does not. Ask them to describe what they think the page or sign is asking them to do, then watch without coaching as they complete it. Fix the first point of uncertainty, repeat the test and stop adding instructions once the route is self-explanatory.

Finally, decide what success means for this particular celebration. It may be a complete set of RSVPs, fewer repeated travel questions, photographs from every table or a thoughtful collection of family messages. A specific aim makes it easier to choose useful features, ignore distracting extras and review the result after the event.

Keep the tone consistent with the invitation and the people attending. A formal event can still use plain instructions, while a relaxed celebration still benefits from accurate dates and clear privacy choices. Read every guest-facing sentence aloud; if it sounds like software documentation rather than a personal invitation, shorten it and return the emphasis to the occasion.

© 2026 GuestiGram · Made with for every celebration
Pay once · No subscriptions